• Skip to primary navigation
  • Skip to main content
  • Skip to primary sidebar
  • home
  • about
  • topics
    • life
      • life lately
      • family
      • autoimmune
      • recipes
      • home
    • growth
      • what I’m learning
      • word of the year
      • goals
      • gratitude journal
    • adventures
      • international
      • road trips
      • northern Virginia/ DC
    • books
  • contact

Autumn all along

  • life
  • growth
  • adventures
  • books
DIY Headlight Restoration: Despite cleaning the rest of the car, we found that we really needed to find a way to detail our headlights. We used a Black & Decker drill for this easy to do project! | via Autumn All Along
  • Bloglovin
  • Email
  • Facebook
  • Instagram
  • Pinterest
  • RSS
  • Twitter
  • YouTube

DIY Headlight Restoration

June 17, 2016home
DIY Headlight Restoration: Despite cleaning the rest of the car, we found that we really needed to find a way to detail our headlights. We used a Black & Decker drill for this easy to do project! | via Autumn All Along

This post is sponsored by Black+Decker through Linqia.com.   This post includes affiliate links which help support Autumn All Along.

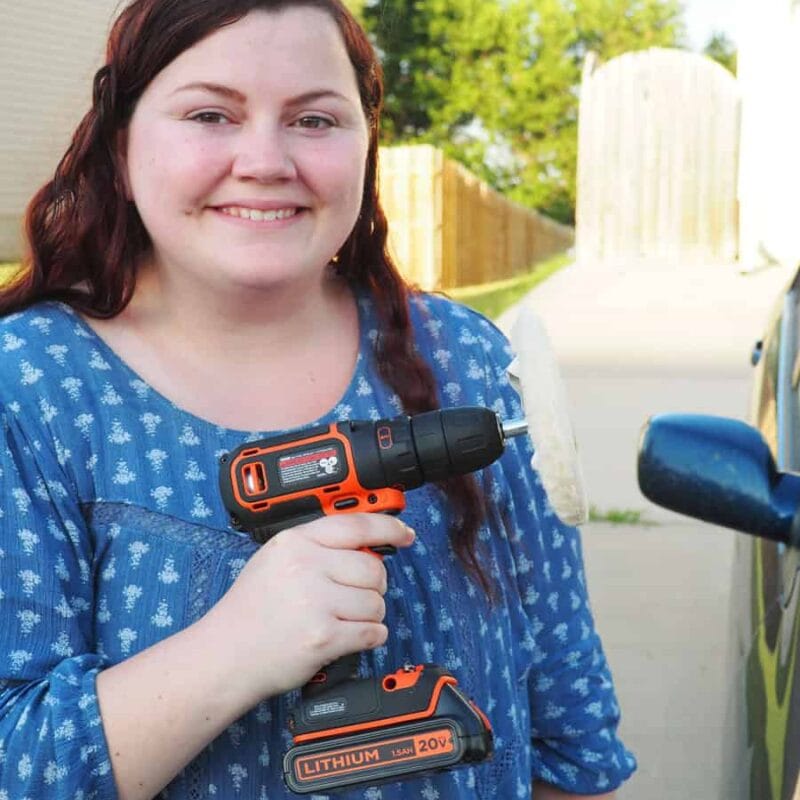
Every time we wash our car, we notice that our headlights always still look… really foggy.  With all of the traveling we are doing, we thought we should do something about that before all of our family sees Devin’s car.  We decided to use our 20V MAX* Lithium Drill/Driver to spruce up our headlights up!  We found that it was easier than we thought it would be and it was great to get a nice car wash to finish everything off afterwords; however, it was totally 100+ degrees the day we did this and I don’t think humans are made for weather that hot… .
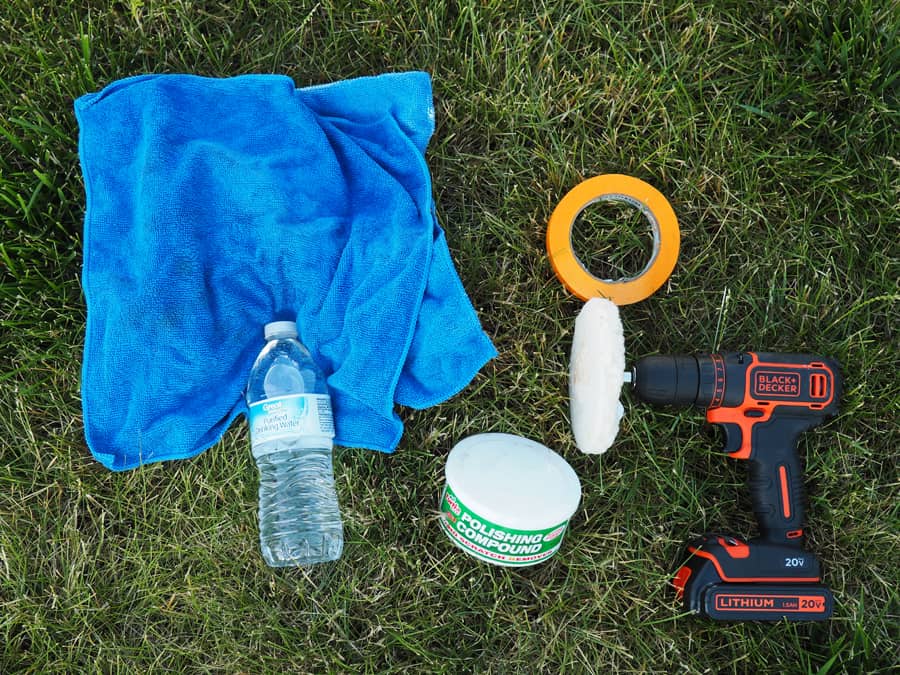
SUPPLIES

  • 20V MAX* Lithium Drill/Driver
  • Automobile masking tape
  • Polishing compound
  • Polishing buffing pad + drill adapter
  • Microfiber towels
  • Water

DIY Headlight Restoration: Despite cleaning the rest of the car, we found that we really needed to find a way to detail our headlights. We used a Black & Decker drill for this easy to do project! | via Autumn All Along

CLEAN THE HEADLIGHT

Take a wet microfiber towel and wipe down the headlight.

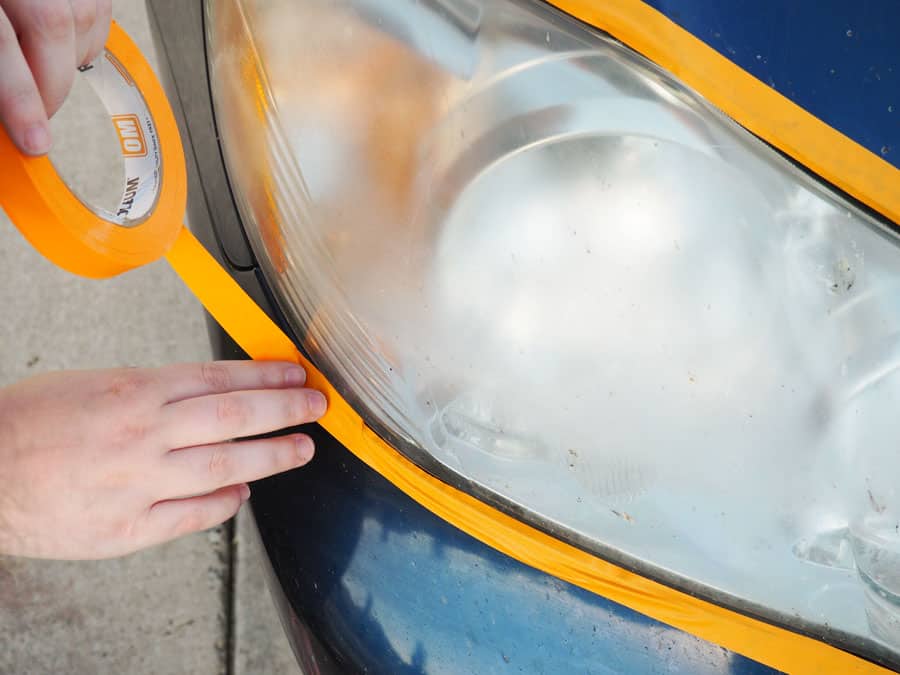
APPLY THE AUTOMATIC MASKING TAPE

Apply automotive masking tape around the headlight as to protect the car paint when you are using the drill.  It is very easy to get tape on the headlight instead of the actual car so be careful!

DIY Headlight Restoration: Despite cleaning the rest of the car, we found that we really needed to find a way to detail our headlights. We used a Black & Decker drill for this easy to do project! | via Autumn All AlongDIY Headlight Restoration: Despite cleaning the rest of the car, we found that we really needed to find a way to detail our headlights. We used a Black & Decker drill for this easy to do project! | via Autumn All Along

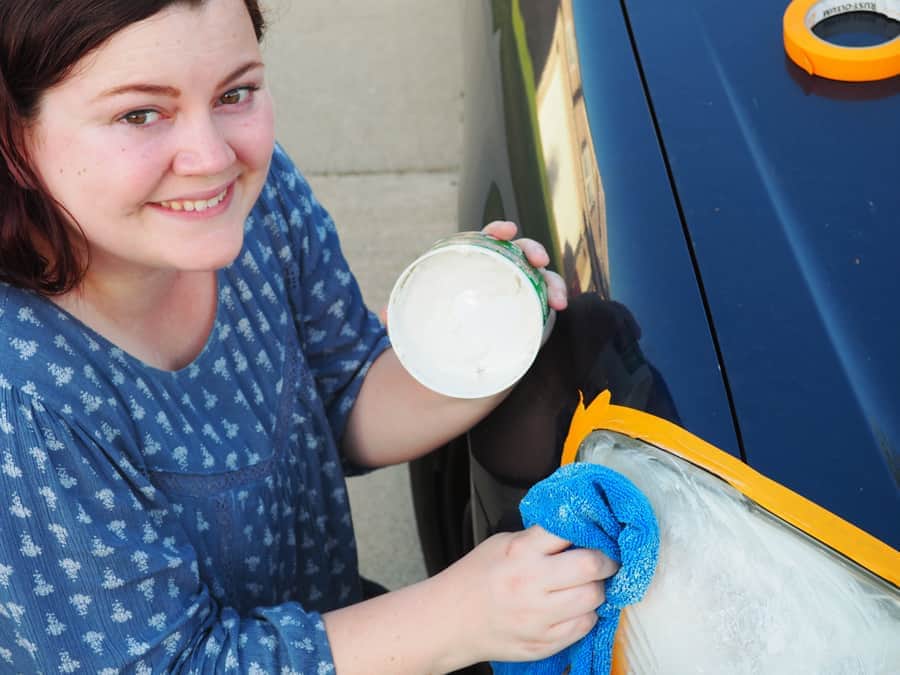
APPLY THE POLISH TO THE HEADLIGHT

Take a dry microfiber towel and dip it in the polishing compound.  Apply the polish from the towel onto the light while rubbing in circles.

ADD WATER TO THE BUFFING PAD

Add water to the buffing pad prior using it on the headlight.  Having a dry buffing pad can cause the headlight to warp due to heat from the friction (we speak from trial and error).

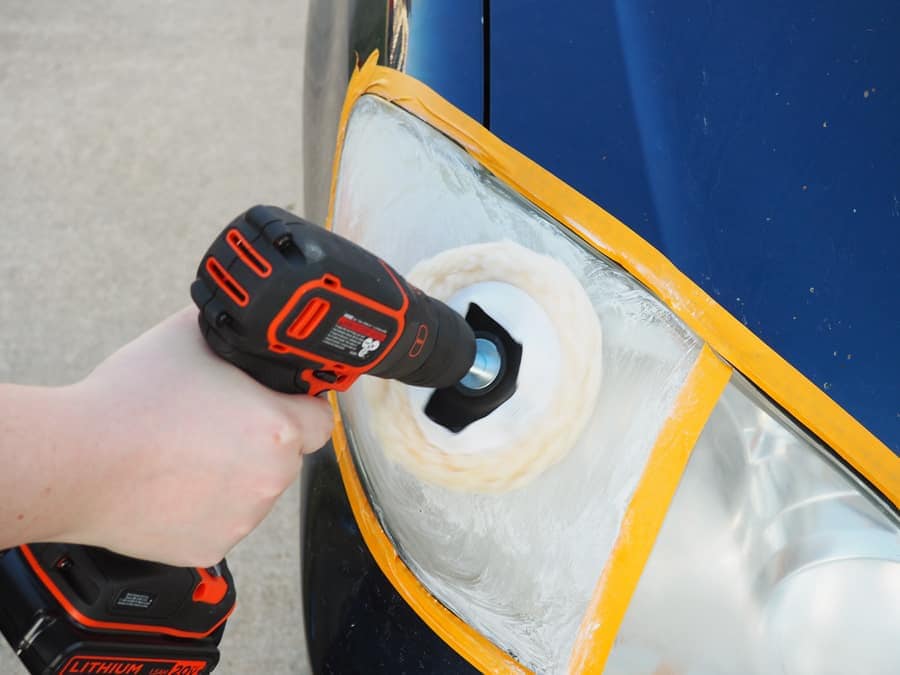
USE THE DRILL TO BUFF THE HEADLIGHT

Use the drill to buff the headlight on a low setting.  Be careful to only use the center of the buff pad from the drill as turning the buff pad on the side while drilling with cause ruts in the headlight.  If the climate or weather is very dry, you can apply more water to the buff pad before continuing to use the drill.

DIY Headlight Restoration: Despite cleaning the rest of the car, we found that we really needed to find a way to detail our headlights. We used a Black & Decker drill for this easy to do project! | via Autumn All Along

WIPE THE HEADLIGHT WITH A DRY CLOTH

After the compound polish isn’t as visible on the headlight, take a dry microfiber towel and wipe off the headlight to see if it has the desired effect.

REPEAT STEPS 3-6 UNTIL DESIRED EFFECT IS ACHIEVED

Since Devin’s headlight is from 2008 and hasn’t been detailed since then, we ended up repeating these steps 5 steps for desired effect.

REMOVE THE MASKING TAPE AND WASH YOUR CAR

As you can tell, the polishing compound made quite a mess.  We definitely recommend getting a car wash after this project 😉 .

DIY Headlight Restoration: Despite cleaning the rest of the car, we found that we really needed to find a way to detail our headlights. We used a Black & Decker drill for this easy to do project! | via Autumn All Along

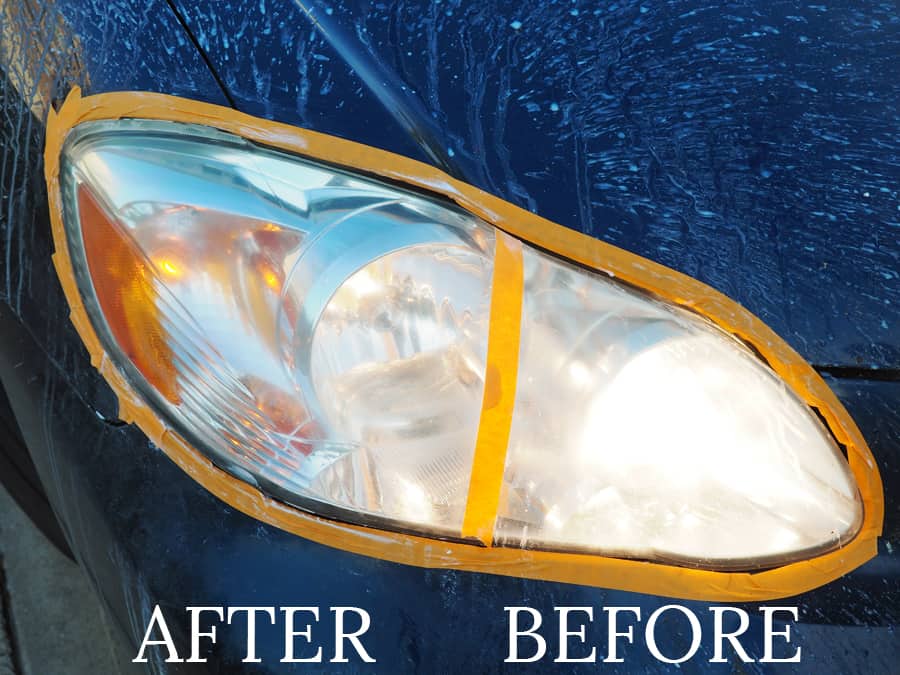
Overall, we were impressed with our 20V MAX* Lithium Drill/Driver and I loved how our headlights looked after our DIY headlight restoration!  We charged it before the night before our project and the battery never died.  The power from the drill remained consistent and I thought it was a perfect size for small projects like this because it wasn’t too heavy.  I’m excited to use my drill again for more projects around the house!

Lucky for you, Black and Decker is giving away a drill and saw with this post :)- comment below what project you would use both for!  The giveaway is open to US residents who are at least 18 years old and will end on July 4th at 11:59 PM.

Previous Post: « Slow Cooker Beef Peperoncini Sliders
Next Post: Things to do in Heber Springs, Arkansas »

Primary Sidebar

hello

My name is Autumn and I'm a 30 something wife and mama living in northern Virginia. I share my highs and lows, the things that make my heart sing, and what I'm learning along the way. Say hello!

elsewhere

  • Bloglovin
  • Email
  • Facebook
  • Instagram
  • Pinterest
  • RSS
  • Twitter
  • YouTube
  • Home
  • About
  • Contact
Copyright © 2025 · Autumn all along · Hearten Made ⟡